
Getting married in Norway is a beautiful fairytale, i.e., if you know the legal process to follow! It isn’t a piece of cake, but not an avalanche to conquer neither. Given the right documents and procedure, you’d be at the start to forever with your loving partner in no time!

It’s been 4 months, 10 days since my now-Swedish husband and I got married in Norway. It was a challenging process, given that both of us are not norske statsborgere (Norwegian citizens). To give an overview of the length of the process: I applied for family reunification visa online in December, got married in January, received my visa by end of March. 😉 Processing time, of course, depends on how complete your documents are. Processing by the UDI can take 4-6 months (see behandlingstid on the website as they change it every month), and then, you have to allow for the time to secure the necessary documents also.
So, here’s your guide to getting married in the Land of the Midnight Sun! Note, however, that this guide is for Filipinas getting married with a Scandinavian (Norwegian. Swedish, Danish, Finnish and Icelandic) in Norway. If you are getting married with someone outside Scandinavia, you should follow a different procedure. Check UDI and Skatteetaten for more information.
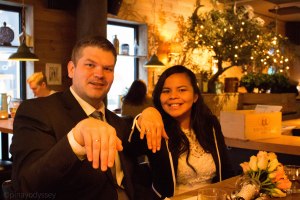
STEP 1. First and foremost, of course, you have to have a Scandinavian fiance! My husband proposed to me in Tenerife and we took it from there. Remember that you should not be forced to marry (proforma or marriage of convenience)! This is an important thing to remember because it might affect your visa application, resulting to deportation or denial from the UDI. You also have to be at least 24 years old. Once you have that shiny, pretty ring on your finger and you and your fiance are really, really sure of tying the knot, the next step is to decide the date for the big day! Why is the date important? Well, the documents have an expiration date. For example, the marriage license is only valid for 4 months! Also, talk about where and what kind of wedding you want. Traditional church weddings require more budget and certain sacraments and seminar, while borgerlig or wedding at a Norwegian court (kommune/tingrett) is free of charge and takes only 5-10 minutes. Once you have decided the date, place and people to invite, proceed to Step 2.
STEP 2. Apply for prøvingsattest (marriage license) via Skatteetaten. The state needs to check whether both of you are eligible to get married. Secure the following documents:
- photocopy of your valid visa card in Norway (au pair, tourist, student, etc.) Note: Anyone with a valid visa can get married in Norway.
- photocopy of your passport
- Egenerklæring (download form in pdf / word format here: https://signform.no/dss/index.php?view=form&id=937) This is also called Erklæring fra brudefolkene for prøving av ekteskapsvilkårene (roughly translated as Declaration from the couple for the marriage license). You and your fiance need to fill out separately. On the form, you will have to put the date and place of marriage, so make sure that you have already talked that out. Also, at the bottom of the form, you will be asked if you want the marriage license to be sent directly to the vigsler (them who will conduct the wedding) or no. If yes, you have to put the name and address of the vigsler.
- Forlovererklæring (download form in pdf / word format here: https://signform.no/dss/index.php?view=form&id=936) You need two witnesses from each side on your wedding day. Usually, the people who fill out the forlovererklæring are the ones who come to the wedding and sign as witnesses as well, but that is not necessary. The forlovere (witnesses) attest to your relationship and your qualifications to get married. They put their names and freedom at risk if they lie. 🙂 My husband’s bestfriend and my aunt served as our forlovere.
- Certified birth certificate and CENOMAR of both sides. Okay, this is how you secure “red-ribboned” (legalized) birth certificate and CENOMAR. Note that you can only get them from the Philippines, not from the Embassy of the Philippines in Oslo or any consulate in any European country. There are two ways you can request for them: 1.) Thru a family member or a friend in the Philippines OR 2.) Thru an agency online or offline.
You need to send the following via post/DHL/FedEx/friend to whichever you choose for them to process your request: 1. photocopy of your passport & 2. SPA (Special Power of Attorney). You can get a SPA from the Embassy of the Philippines in Oslo or from Consulates in other European countries. On the application form, you will have to write the name and address of the person you entrust to process and pick up your documents. If you get it from Oslo, it costs 225 NOK and takes 3 days. You can have it sent to your address though for an additional fee of 180 NOK. (Check http://www.philembassy.no for updated pricelist) Once you receive your SPA, send it together with a photocopy of your passport to your family member/friend/agency. (DOWNLOAD APPLICATION FORM FOR SPA here: https://www.philembassy.no/sites/default/files/downloads/special-power-of-attorney.pdf).
Once your family member/friend/agency received your SPA and copy of passport, they can start securing your legalized CENOMAR and birth certificate. Both documents are acquired from the National Statistics Office, and then the Department of Foreign Affairs for the red ribbon/legalization. Once they have your needed documents, they can send them back to you via post/DHL/FedEx. Allow 2-4 weeks for the whole process. 🙂 I got mine thru an agency and after 2 weeks, I already have my legalized CENOMAR and birth certificate.
About your fiance, he also needs to secure his birth certificate and CENOMAR from the Folkeregistreret. If he’s Swedish, he can request for his personbevis from http://www.skatteverket.se. It takes 2-3 days. The personbevis contains information about his birthplace and civil status, and yes, the Swedes don’t have an elaborate birth certificate like other countries. 🙂 NOTE: Your fiance’s documents don’t need to be translated nor legalized, except for when you are to apply for Report of Marriage in the Philippines (we’ll get to that later).
Now, if you or your fiance had been married before, you also need to fill out the erklæring om skifte. If not, then, you’re good to go!
Once you are ready with all the documents listed above, put them in a secure envelope and send them to the nearest skattekontoret (Tax Office). Use the locator on this page to find the nearest skattekontor: http://www.skatteetaten.no/no/Om-skatteetaten/Kontakt-oss/Kontor/ It takes 3-4 weeks to receive your marriage license. TIP: Call skatteetaten after one week if you haven’t received the license yet. Follow up every other day after that. Why? Because I received a tip that when they find something wrong with your application, they don’t process it nor inform you, so it’s your initiative to reach out to them. 😉 Also, they usually send it to whoever is older. We applied for the marriage license on December 17 and received it by post on January 2. 🙂
Once you have received your Prøvingsattest/Melding om vigsel/Vigselsbok on the mail, congratulations, you two are eligible to get married!
STEP 3: Send the prøvingsattest (marriage license) to the vigsler (marriage conductor). This can be done by post or personally. For example, my husband and I decided to get married at Drammens Tingrett (Courthouse in Drammen). He delivered the paper personally and booked the date and time of our wedding. If you decided to marry borgerlig, just check your kommune’s webpage for more information as to how to book for the wedding and the normal procedure. You get to choose to have the ceremony in English or Norwegian. You also need to inform the vigsler if you are exchanging rings or vows during the ceremony.
STEP 4: Arrive on your wedding day! Normally, you will have to be there at least 15 minutes before the wedding. You are allowed to wear whatever you want, and invite witnesses and guests. Actually, only the witnesses are obliged to be there. 🙂 Have your reception and party and enjoy the BIG DAY! 🙂 After the ceremony, the judge will give you a midlertidig vigselsattest (temporary wedding certificate). You can use this to apply for your new visa on UDI, with the permanent wedding certificate to be sent electronically later. The vigsler will send the documents to Skatteetaten within 3 days, and after 2-3 weeks, you will receive you Marriage Certificate by post. If you don’t live with your husband yet, they will send it to whomever is older.
STEP 5: If you decide to have your name changed following your husband’s last name, you can apply for it electronically at Skatteetaten (melding om navnendring). It takes 2-3 weeks to process. Once granted, your name will be automatically changed on the UDI database, as well as on your other government accounts. The same goes if you change your address. However, it is not automatic with your bank accounts, so you have to inform your respective bank about the changes and if possible, to send you a new ATM card with your new name.
STEP 6. Now that you are (happily) married, it’s time to process your new visa. Since you have a Scandinavian husband, you have two options: the family immigration visa or the residence card for family members of EEA/EU nationals. The difference? If you choose the first one: you get access to free Norwegian language course (550 hours) and social studies/samfunnskunnskap course (50 hours) AND you can apply for permanent visa after 3 years. BUT you have to pay an application fee of 8000 NOK and your husband should have an income of at least NOK 306 700 per year pre-tax (2017). As of 2017, the processing time is 4-6 months. If you choose the residence card: you can apply for permanent visa after 5 years, no application fee, no income requirement, and shorter processing period, BUT no free norsskurs or samfunnskunnskap kurs. Remember that you need to fulfill them as requirements for the permanent visa application. (NOTE: If you are marrying a Norwegian, you only have the first option. The income requirement remains to be NOK 306 700 per year pre-tax, but the UDI can accept special situation. Read more about them here.)
I already finished the language courses even before getting married, but still, we chose the first option. 🙂
Go to this webpage to start your application on the Application Portal of the UDI: https://selfservice.udi.no/en-gb/. Since you have a valid visa in Norway, I assume that you already have an account. Log in and start an application for family reunification visa. Answer the questionnaire completely, review, and then pay the application fee (if you choose the first option). Then, book an appointment with the politi (police) where you live to submit your documents. TIP: You can apply online even before the marriage and book an appointment, so as to get the nearest available date. It can take months to book an appointment sometimes, so it won’t hurt to heed my advice. You can always reschedule your meeting. 🙂 Afterwards, print the Cover Letter and the Checklist. You are now to gather all the documents needed for the visa.
ON COMPLETING THE CHECKLIST & ANSWERING THE QUESTIONNAIRE:
- Read the checklist carefully and mark the requirements that apply to you. You don’t have to submit everything, or to include unnecessary documents like school diplomas, etc. You only need to submit the Cover Letter, the Checklist (with marks of the documents you have), the Questionnaire, and the documents themselves.
- Your DUF-number is found on the document you received the first time you entered Europe. It’s a 12-digit number that begins with the year you first entered the EU. For example, I moved to Europe in 2013, so my DUF-number is 2013XXXXXXXX. This will also serve as your reference number.
- With regards to your birth certificate, you can request Skatteetaten to send back your BC after you receieve the marriage license (prøvingsattest) so you don’t have to get another one.
- You will only need to give photocopies of the documents. You have to bring the originals for verification, but the staff will only get the photocopies and stamped them as CTC (certified true copies). Make sure your photocopies are clear.
- As I’ve mentioned above, you can submit a photocopy of the temporary marriage certificate. When you receive the real marriage certificate (vigselsattest) by post 2-3 weeks after your wedding, scan it and send it electronically to UDI.
- With regards to the questionnaire, you can use a separate sheet for your answers. Write legibly, or better yet, have it typewritten. Yes, it’s allowed. 🙂 If you have questions on how to answer them, I can give you tips but I can’t answer them for you. Don’t forget to sign the questionnaire after!
- You have to submit your application to the police office where you live. If your husband lives in another kommune and your visa has been granted, you collect your visa from the politi where he lives, or where both of you plan to live together.

STEP 7. This is the booooooooring part. This is when you wait and wait and wait and wait. It’s important to stay positive and anticipate an affirmative response to your visa application, but make plan Bs as well, just in case. Every month, you will receive an update from the UDI by email. If you miss an update, feel free to contact them. Also, think long term. Avoid doing illegal things like taking black jobs. You are allowed to take classes or courses, both academic and for fun. With regards to formal schooling, it depends on the school if they’d let you study with your visa on process. If you are an au pair, as per conversation with a UDI advisor, you are allowed to finish your contract while waiting for your application.
During the waiting period, I did lots of activities for fun — blogging, cross-stitching, knitting, going to the library, walking, among others. Keep yourself busy! ❤
By the way, your current visa will be tilbakekladt, or revoked, once the UDI receive your new visa application. That means, you cannot travel outside Norway. But don’t worry, Norway has lots of beautiful spots to offer, so this is the best time to get to know Norway. 😉
I submitted the documents to the politi on January 18, the UDI received it on February 3, and on March 29, finally, I received the good news!
STEP 8. Once your visa is granted, you have to book an appointment with the politi to collect your visa and do the biometrics. You will also have to submit your old visa card. Within 10 days, you will receive your visa card by post. And then, you can travel outside Norway again. 🙂
STEP 9. Before you make your travel arrangements, make sure that your name on your visa kort and your passport are the same. Hence, you need to apply for a new passport. You can also apply for the RoM, or Report of Marriage, AT THE SAME TIME, i.e., if you want your marriage to be recognized in the Philippines as well. All the requirements are found on www.philembassy.no. For the RoM, note that all the documents should be translated to English, so you have to request for the flerspråkelig (many languages) version of your marriage certificate from Skatteetaten, and your husband’s birth certificate or personbevis or Extract of the Population Register should also be in English. When you fill out the application form, make sure that names are translated to English as well, for example, use “Courthouse” instead of Tingrett, etc. Your marriage certificate should be legalized by the Ministry of Foreign Affairs. It’s located near Nationalteatret, free of charge, and takes only around 5-10 minutes. The legalized original version will be submitted, together with two photocopies. Read more about Report of Marriage here: https://www.philembassy.no/civil-registry-marriage-birth-and-death/report-of-marriage. I got my new passport after exactly one month.
STEP 10. Apply for norskkurs and samfunnskunnskap kurs on your respective kommune’s Introduksjonssenteret or Opplæringsted. Sometimes, it can take months to get a slot, but in other cases, like mine, you’d be sitting inside a classroom after 3 days. You can also start looking for a job. 🙂 Normally, you will receive a visa valid for one year. which you will have to renew annually until you can apply for a permanent visa.
There you have it. 10 easy steps. 🙂 If you have questions or clarifications, just leave a comment and I’ll get back to you ASAP. It makes me happy to share what I know, but of course, it is still to your best interest that you contact the UDI directly, as what I did all throughout the process.
If you also have questions about applying for universities or høgskole in Norway, feel free to ask me as well. 🙂
Thanks and hope you’d find this guide helpful!! Skål!
#spreadlove


Leave a reply to PinayOdyssey Cancel reply